The boys and I undertook a new project today; home made vegan lipgloss. Through a variety of online sources I decided to go with a coconut oil base, and candy flavourings among other ingredients. They didn't turn out super awesome but they each made their own flavour and got 3-4 little tubs to use for themselves. Steven made creamsicle, Noah made root beer float, I made grape and then I also made Butterscotch for the bf. I won't share the recipe as it needs a little tweaking still :) but have a peek at our results
For dinner I made vegan "pot roast" which is really really simple. (Serves 2)
What you need:
1 package Gardein homestyle beef less tips
2 potatoes peeled and cut into bite sized pieces
2 carrots peeled and cut into bite sized pieces
chopped onion & garlic if you want (I use lots of garlic)
spices: I use seasoning salt, pepper and a little regular salt
1c prepared vegan "beef" stock (I use Nutrimax Soup Mix "Beef" Flavor-which is vegan; it's powdered and you add boiling water)
What you do:
Pour stock into the bottom of a glass or metal baking dish. Dump in all other ingredients, mix up well, cover with lid or foil and bake approx 35-45minutes or until the vegetables and done. I use a little more of the vegan beef stock to make a quick gravy to pour over top.
TADA!
Friday, January 27, 2012
Wednesday, January 25, 2012
French Toast....Muffins?
Yes you read that correctly; French Toast MUFFINS! SO yummy! These muffins are sweet and cinnamon-y without being too "eggy"
What you need:
1 1/2c all purpose flour
1/2c white sugar
1 1/2tsp baking powder
1/2 tsp salt
1/2 tsp cinnamon
1/4 tsp nutmeg
1/3c margarine or butter, melted (I use Earth Balance buttery flavour shortening sticks)
2 eggs
1/2 c rice milk (could use cows milk, soy milk, any milk really)
What you do:
Begin by preheating your oven to 350 degrees. Combine all dry ingredients in a medium sized bowl. In a small bowl heat margarine in the microwave or in a small pot until melted. Add eggs and milk and whisk until combined. Gently add the wet mix to the dry mix and stir gently just until combined, don't over mix! Lightly oil your muffin tin (I use a 24 ct mini muffin tin but the larger size works too). Bake 15-25 minutes depending on muffin size.
Topping:
2 T melted margarine or butter
1/4c white sugar
1T cinnamon
In one bowl, melt margarine. In second bowl, combine sugar and cinnamon well. When muffins are removed from oven, before they cool too much, dip the top of each one gently into the margarine, and then the cinnamon and sugar mix.
Caution: Do not try to eat just one. Plan to eat at least 3. Seriously. Try them and see!
Wednesday, January 18, 2012
Vegan chocolate chip cookie dough ice "cream"
This is a long awaited post by some....
Coconut milk ice cream (serves 4, easy to halve)
2 cans lite coconut milk
1/2c sugar
2tsp vanilla
(Next time I would use less or no sugar in the ice cream itself as I found it a bit too sweet with the cookie dough added. Everyone else loved it the way it was.)
Mix all ingredients in bowl, set up your ice cream maker and follow the manufacturers instructions. Mine says to add mixed ingredients through the trough at the top while the machine is on. My machine takes about 25 minutes to make soft serve. I added about half of the cookie dough squares to the ice cream, mixed and served in 4 bowls with a couple extra cookie pieces on top. Warning! I could not stop eating this dough...just the way it is! Sooooo yummy. It's easy to turn into a dip for cookies, just add some water or rice milk to thin it to a dipping consistency !
It was really good!!
YES IT'S VEGAN!
You do need an ice cream maker for this; I bought one for around $25 at Walmart or some such place. Alternatively you could probably buy vegan ice cream such as coconut milk ice cream and just add the dough....
So to start, I made the cookie "dough"
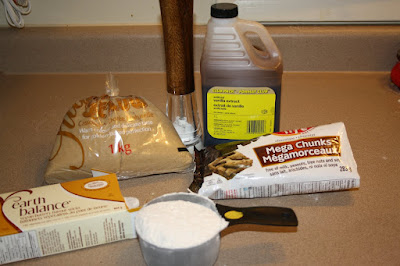
Chocolate chip cookie dough
1/2c softened Earth Balance buttery sticks
3/4c brown sugar (could use agave but add more flour)
1c all purpose flour
dash salt
1 Tbsp vanilla (yes thats a tablespoon)
1c vegan chocolate chips (I use Good Life brand which is free of most allergens)
Cream margarine, salt and sugar. Add vanilla, stir to mix. Add flour and chocolate chips and mix until it forms a fairly dry ball - you do want it a bit drier than regular cookie dough. I lined a small baking pan with parchment paper, pressed the dough into the pan, scored it into small pieces and then stuck it in the freezer for about an hour.
Coconut milk ice cream (serves 4, easy to halve)
2 cans lite coconut milk
1/2c sugar
2tsp vanilla
(Next time I would use less or no sugar in the ice cream itself as I found it a bit too sweet with the cookie dough added. Everyone else loved it the way it was.)
Mix all ingredients in bowl, set up your ice cream maker and follow the manufacturers instructions. Mine says to add mixed ingredients through the trough at the top while the machine is on. My machine takes about 25 minutes to make soft serve. I added about half of the cookie dough squares to the ice cream, mixed and served in 4 bowls with a couple extra cookie pieces on top. Warning! I could not stop eating this dough...just the way it is! Sooooo yummy. It's easy to turn into a dip for cookies, just add some water or rice milk to thin it to a dipping consistency !
It was really good!!
Friday, January 13, 2012
Craft storage! (More organization!)
I've always had all my crafty stuff shoved in various boxes, once even all in the same closet. When we moved into this house (Boyfriends grandparents) there was an existing "wrapping station" in the basement which was a small dresser filled with ribbon and bows and tissue paper and an empty table beside it. Always I've wished for organization, and a way to get to DO crafty stuff when the mood strikes without having to sift through 20 boxes of stuff to see what I even have. I decided to re-purpose our home office closet into a craft/gift wrapping centre.
Before:
As you can see, it was half filled with empty computer boxes, random assorted leftover electronics and boxes of paperwork. So i hefted them all down to the basement, repurposed a plastic see through drawer system from the office (Switched it out with that small dresser that had the wrapping stuff in it!). Added a small table, a second shelf, some string to hold up the wrapping paper rolls and some hooks for scissors. All I need to do now is find the rest of my craft supplies, and make labels for everything. Check out the new look:
Top shelf left to right: Baskets/fake flowers, new in package christmas ornaments, basket of glue/tape/string/thumbtacks, assorted bits of ribbon, gift bags/boxes, and the 2 bins on the end one is fall craft sets and the other is filled with clear plastic christmas ornaments of various sizes.
On the closet rod: Ribbon sort of sorted.
Second shelf: New Christmas lights, chinese take out boxes, extra paper ribbon, jars with various things such as paintbrushes, buttons, clothespins, sea shells etc. Wooden frames, magnetic sheets (into the next picture below this one) one basket of gift tags, one of gift cards, plain white gift boxes in various sizes.
Under the counter storage for the paper cutter, paint (all I could find at the moment) gift wrap along the wall. In the plastic drawers there is flat wrap, tissue paper, bows and ribbon.
And of course the various scissors along the wall.
My boyfriend came home from work and said "Do you know what a day off is!?" and I said "YES! A day to do projects like this that take all day!" He just shook his head (But he likes it!)
So what do you think?
Labels:
craft storage ideas,
organizating,
spring cleaning
Tuesday, January 10, 2012
Organization....
I say it every year...this year I'll get more organized! I'll clean up the boxes of photos (and 1000's of digital not-yet-printed ones!). I'll have organized closets and have everything I need at my fingertips! I'll have cute little craft boxes all labelled with what's inside! I'll stack my fabric according to colour; or who it's for; or the pattern! I'll have a central system for meals, for work and play schedules, for LIFE! Really though I'm just not that energetic...So my only goal this year is to organize ONE thing a month, and keep it for the whole month before I can start the next one. With that in mind was the first project of the year!
Old system: (which was fine really albeit a bit messy and required me to change it daily!)
Progress of new system:
After some paint:
The finished product:
The frames are bare wood, I just grabbed them from the dollar store and painted them fun bright colors. Printed off the days of the week on matching colored paper and inserted them into the frames. We just use dry erase markers to write on the glass! We write each days details down one week at a time on Saturday afternoon/evening for the following week. I work shift work so we write my schedule, who's picking the kids from school, countdown to family events or vacations, play dates, homework due dates etc. Everyone knows to check this before they leave the house for the day. Such a life saver!
Idea from HERE
Wednesday, January 4, 2012
Vegan Alfredo Sauce
This is soooooo sooooo good!! To be honest I haven't had "non vegan" alfredo sauce in so long I might be biased in thinking this is just as good!
Vegan Alfredo Sauce
1/2c Earth Balance Margarine (I always use the "butter flavoured" one)
1/2c all purpose flour
1c soy milk
1c rice milk
6 cloves garlic, minced or pressed through garlic press
1tsp fresh cracked black pepper
1/2tsp salt
1tsp parsley
1/2tsp garlic power (not garlic salt!)
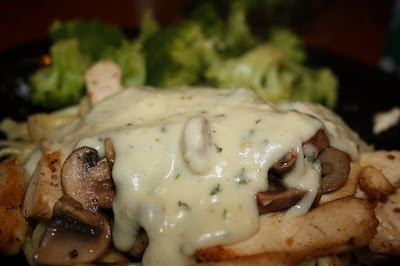
In a medium saucepan heat margarine until bubbly. Add parsley, garlic powder, salt, pepper and garlic, cook on medium until the garlic is cooked and the spices are blended. Add flour all at once and stir to combine completely. Cook for 1 minute. Remove from heat, add rice and soy milks and whisk briskly to combine. Return to heat and cook until thick. We eat this with mushrooms and chicken (or Gardein chick'n cutlets) and pasta. Of course you could make this non-vegan by using cows milk. This version is much better for you :)
Sunday, January 1, 2012
New Year's Eve 2011
Noah is really twisty!
Happy New year to all! This year I'm going to try super hard to take more photos, cook more amazing food, be more organized, and blog more often to document that list. Last night we went to a friend's for New Years Eve and a great sober time was had. Before we headed out Noah and I made crepes for dinner.
German Crepes:
1 1/2c all purpose flour
1/2 tsp salt
3 large eggs
2c 2%, rice OR soy milk ( I use a mix of rice and soy milks)
Add flour and salt to bowl, make a well in the centre and add the unbeaten eggs and 1 cup of the milk. Mix well until no lumps remain. Add remaining 1 cup milk and stir to make a smooth thin batter. Preheat 2 or 3 no stick frying pans on medium heat. Lightly oil with pastry brush. To make crepes, hold pan and spoon about 1/4c batter onto hot pan, swirling quickly to coat bottom of pan. They cook quite fast so by the time you pour the second or third one the first will need to be flipped. Flip just to cook the opposite side. Slide onto plate (I keep one warm in the oven till they are all done) and repeat until batter is gone. I usually have to make a double batch so we can have leftovers. Single batch makes about 30 crepes. We serve ours with jam, or cinnamon and sugar, or whipped cream and fruit.
Subscribe to:
Posts (Atom)